It's time to create your first work record in TimeChief!
You have two options:
create a record manually
create a record by clocking in
In this article, we'll guide you through the steps to add work times manually.
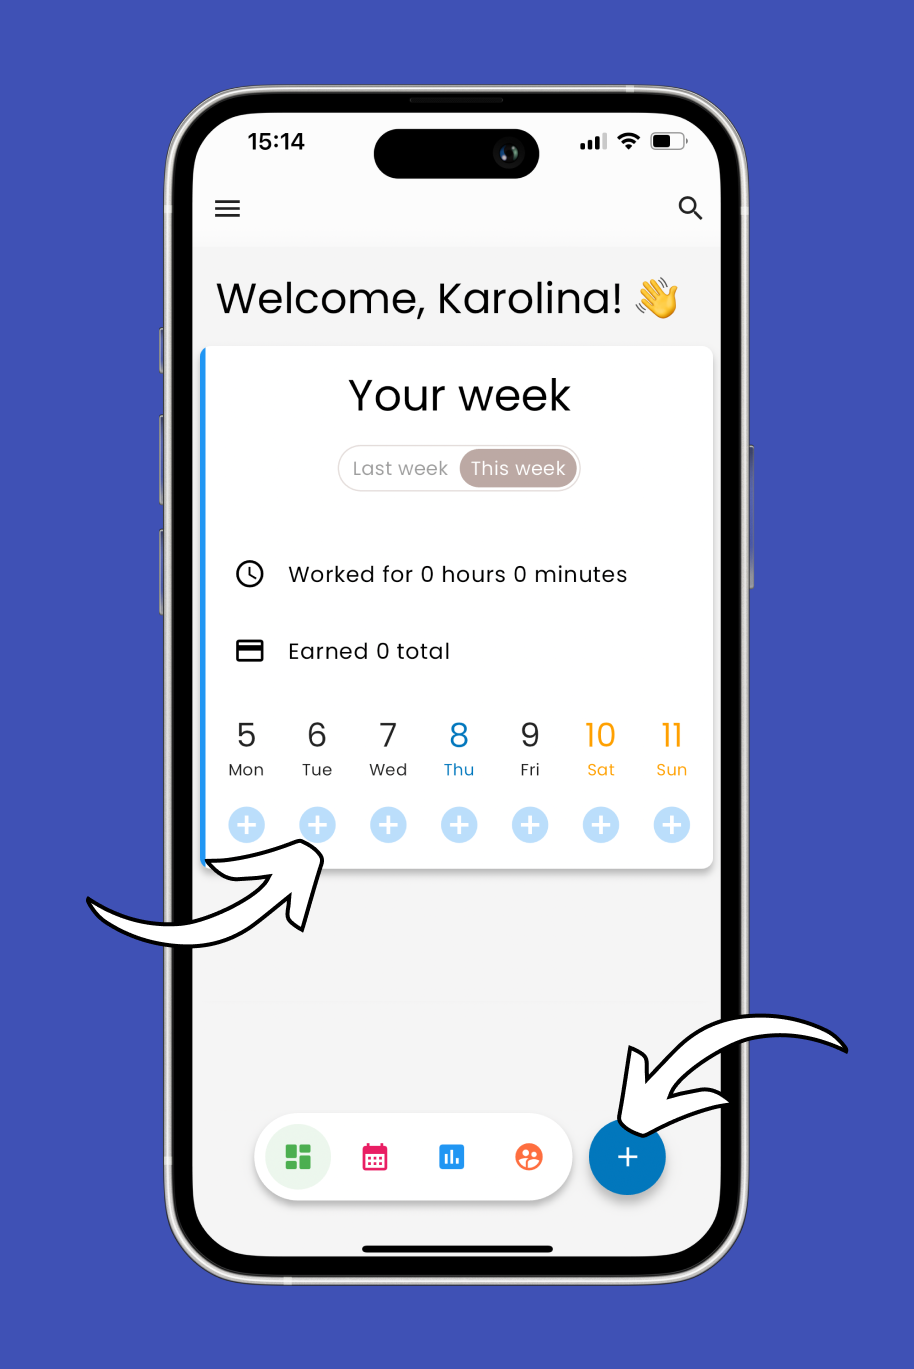
Start by launching the TimeChief app on your device.
On the main screen, you'll see an overview of your week. To create a new work record, tap the + button on the bottom right corner of your screen or tap the + button on a desired day.
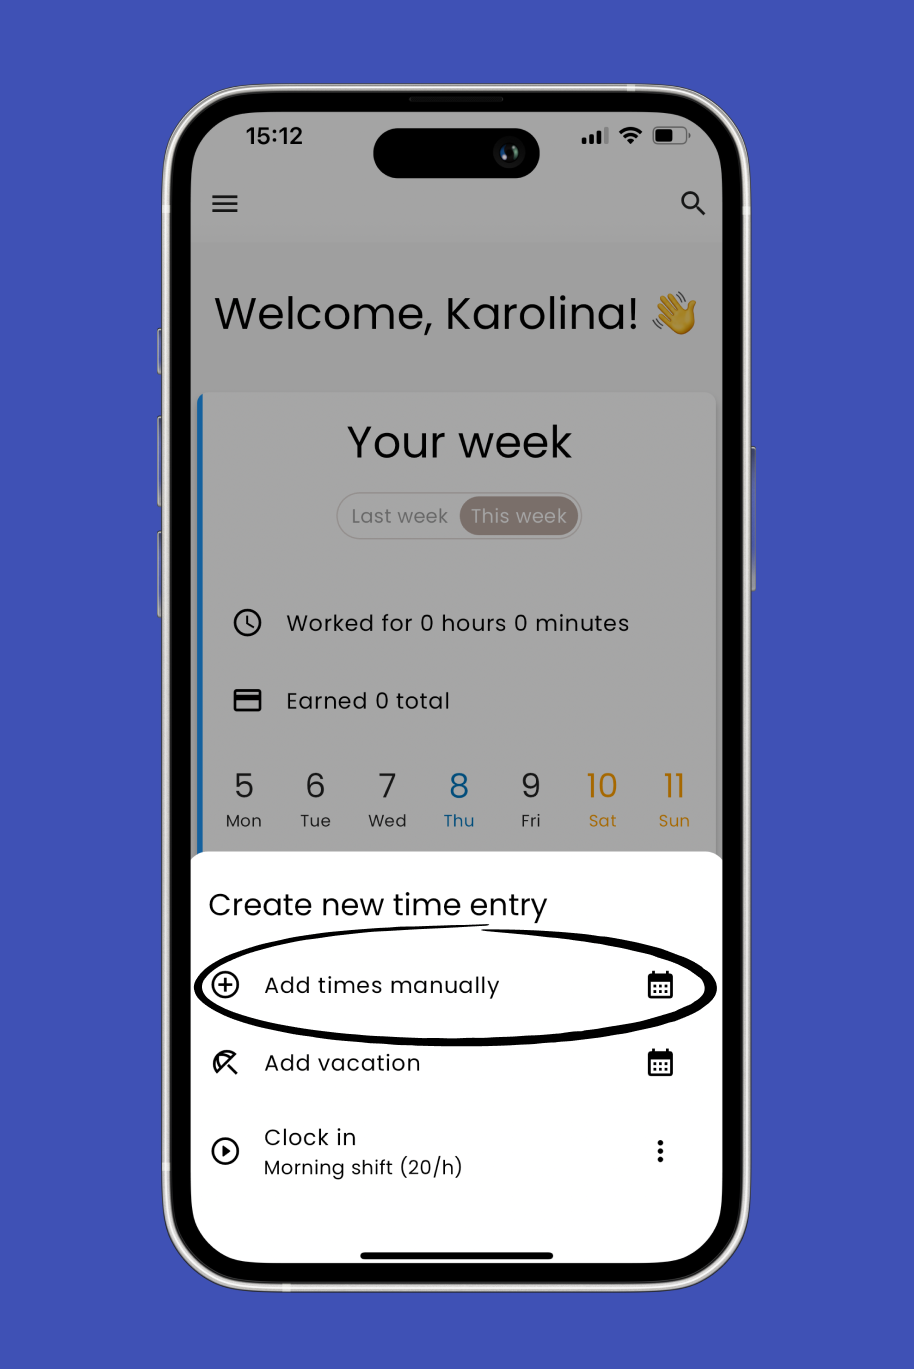
In the options that appear, select Add times manually to enter your work hours manually.
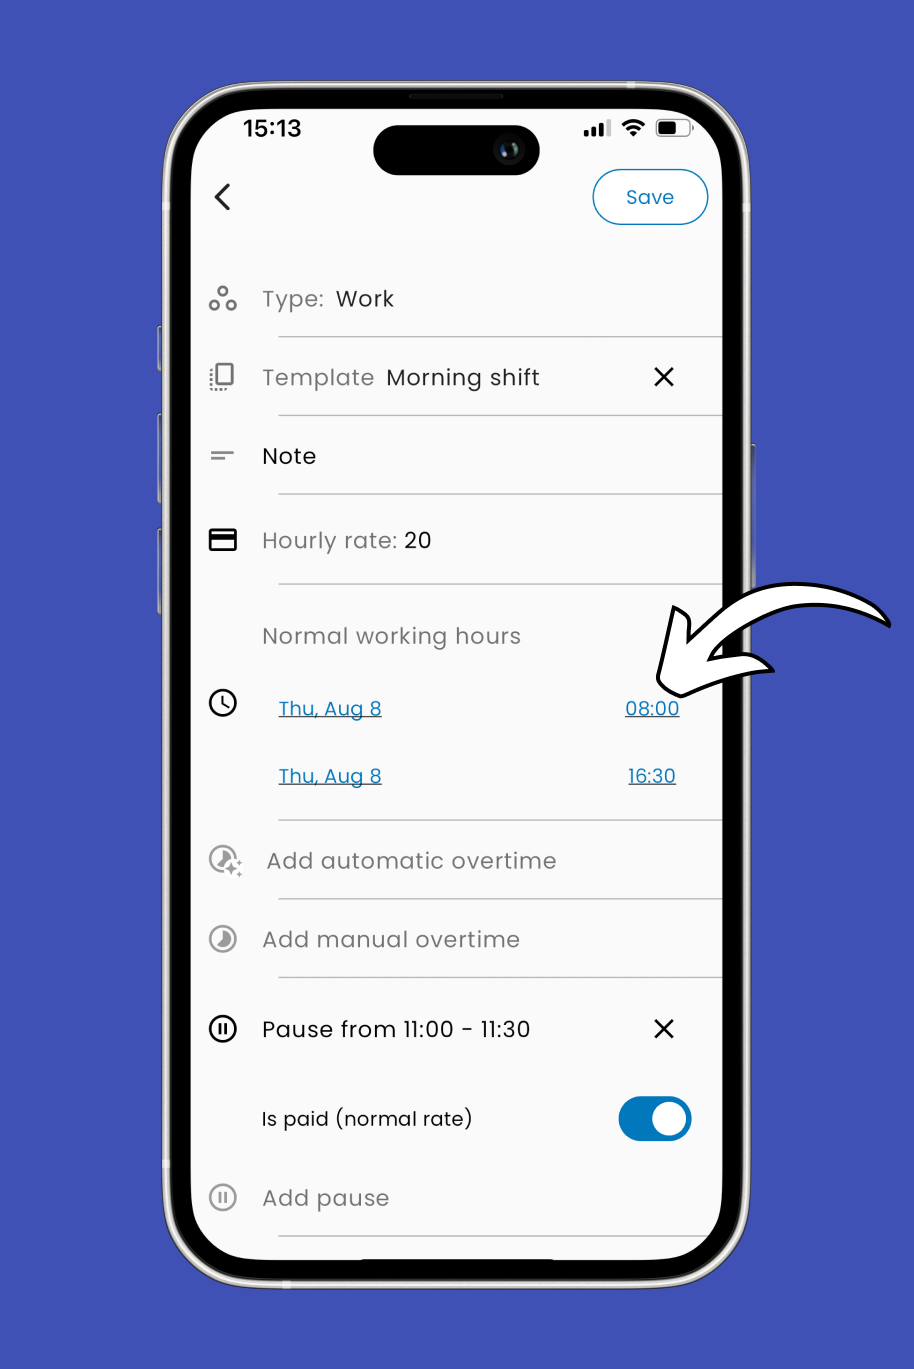
If you have a template set up, you’ll see the default data populated. You can adjust this information as needed to reflect your actual work times.
To adjust your working hours, tap on the starting or ending time displayed in the record.
A time selector will appear, allowing you to change the time as needed. Adjust the time to reflect your actual work hours.
In the same way, you can change the date of your record.
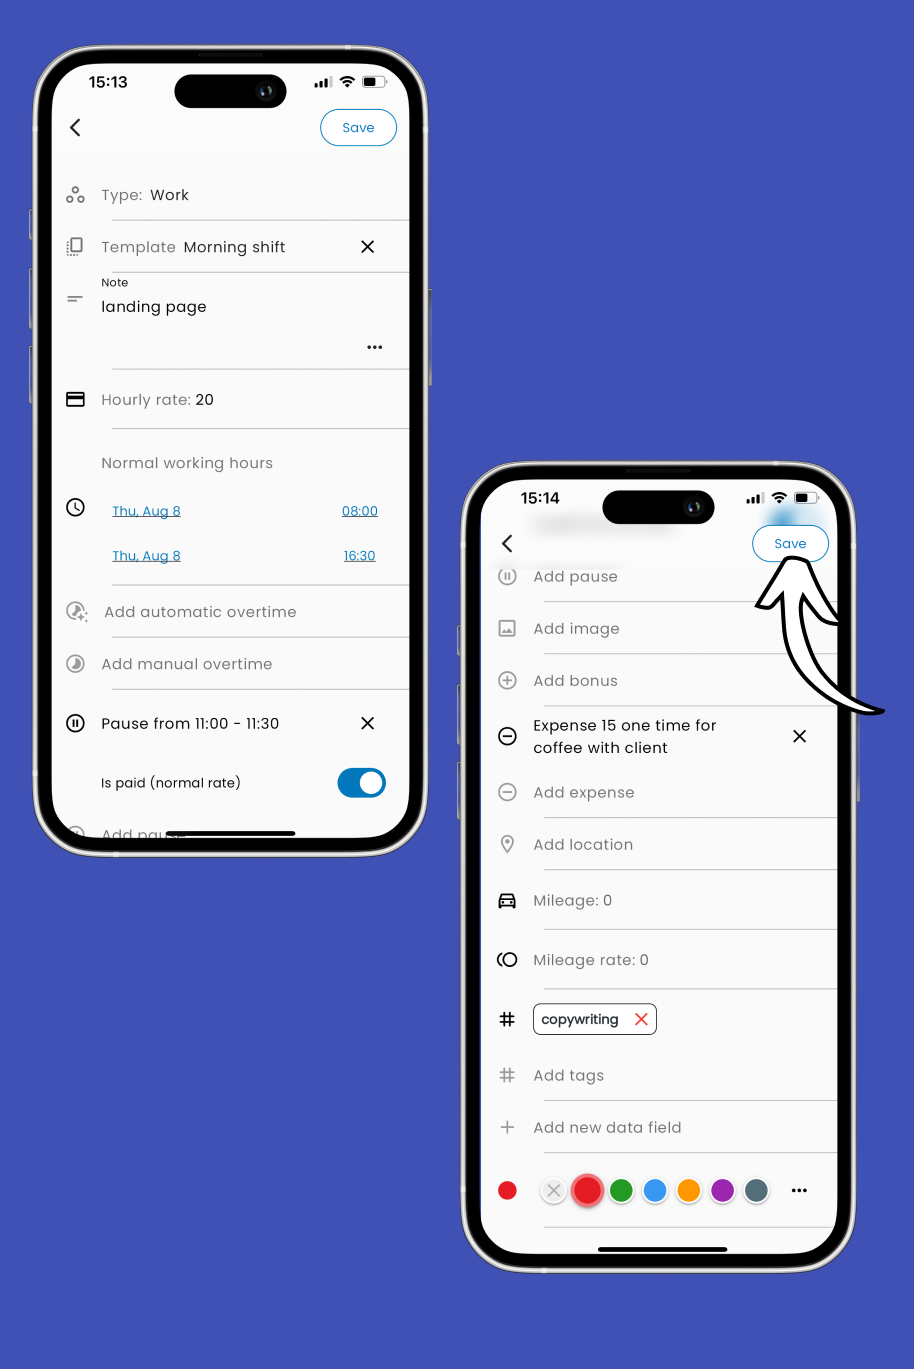
Enhance your work record by adding, for example:
Notes: Briefly describe the work done.
Images: Attach any relevant pictures related to your work.
Expenses: Log any expenses incurred during your work.
Tags: Add tags to categorize your work for easier tracking.
Once you've entered all the necessary details, tap Save in the top-right corner to store your work record.
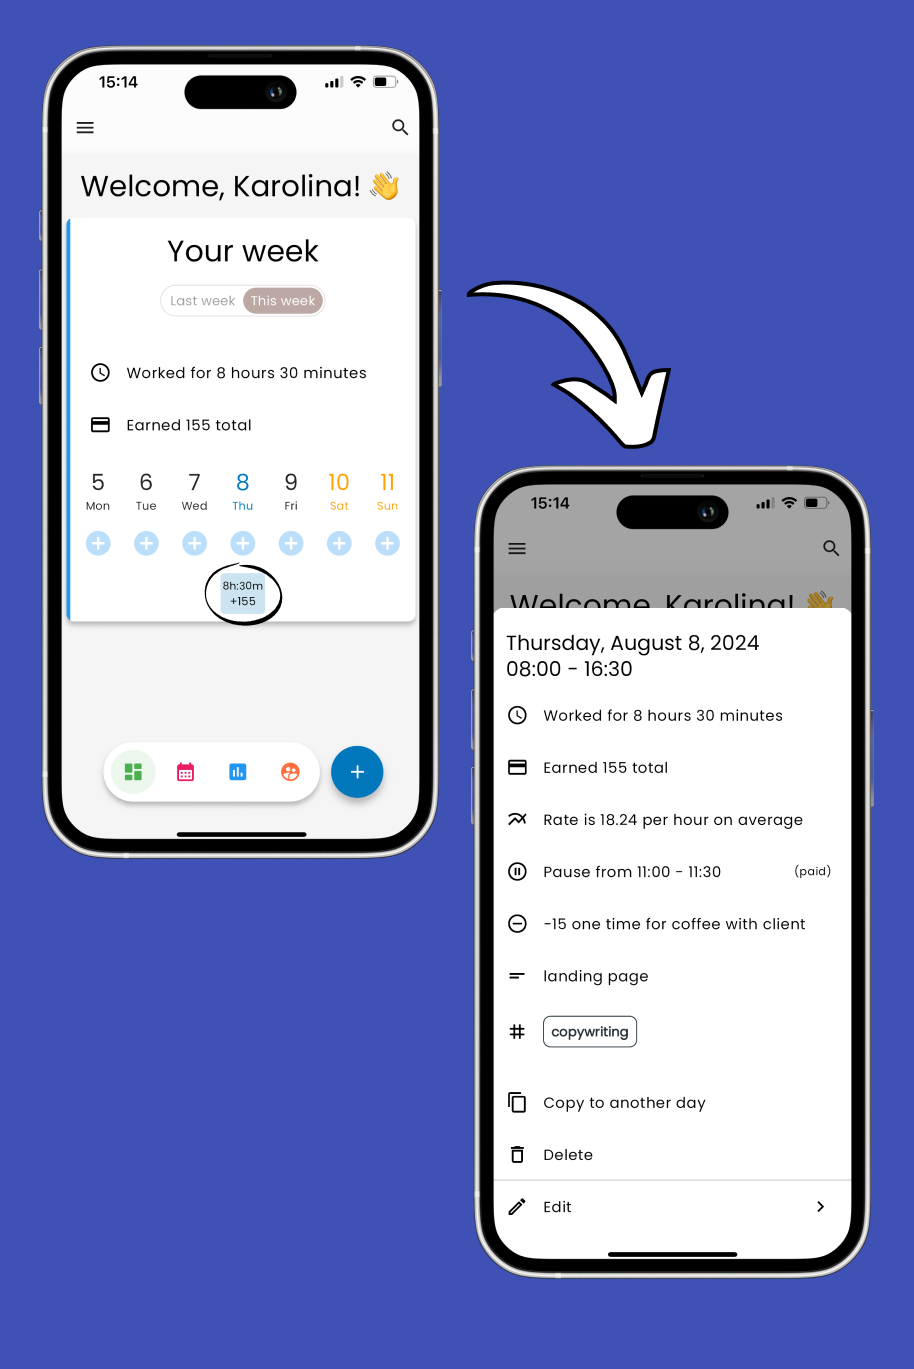
After creating your work record, you'll see it on the main screen. Tap on it to see the details.
Related Articles: 👇🏼
Add Work Times with Clock In
How to add work times with clock in