You may already know the way to create a work record manually. Now it’s time to learn how to create a work record by clocking in! 🕑
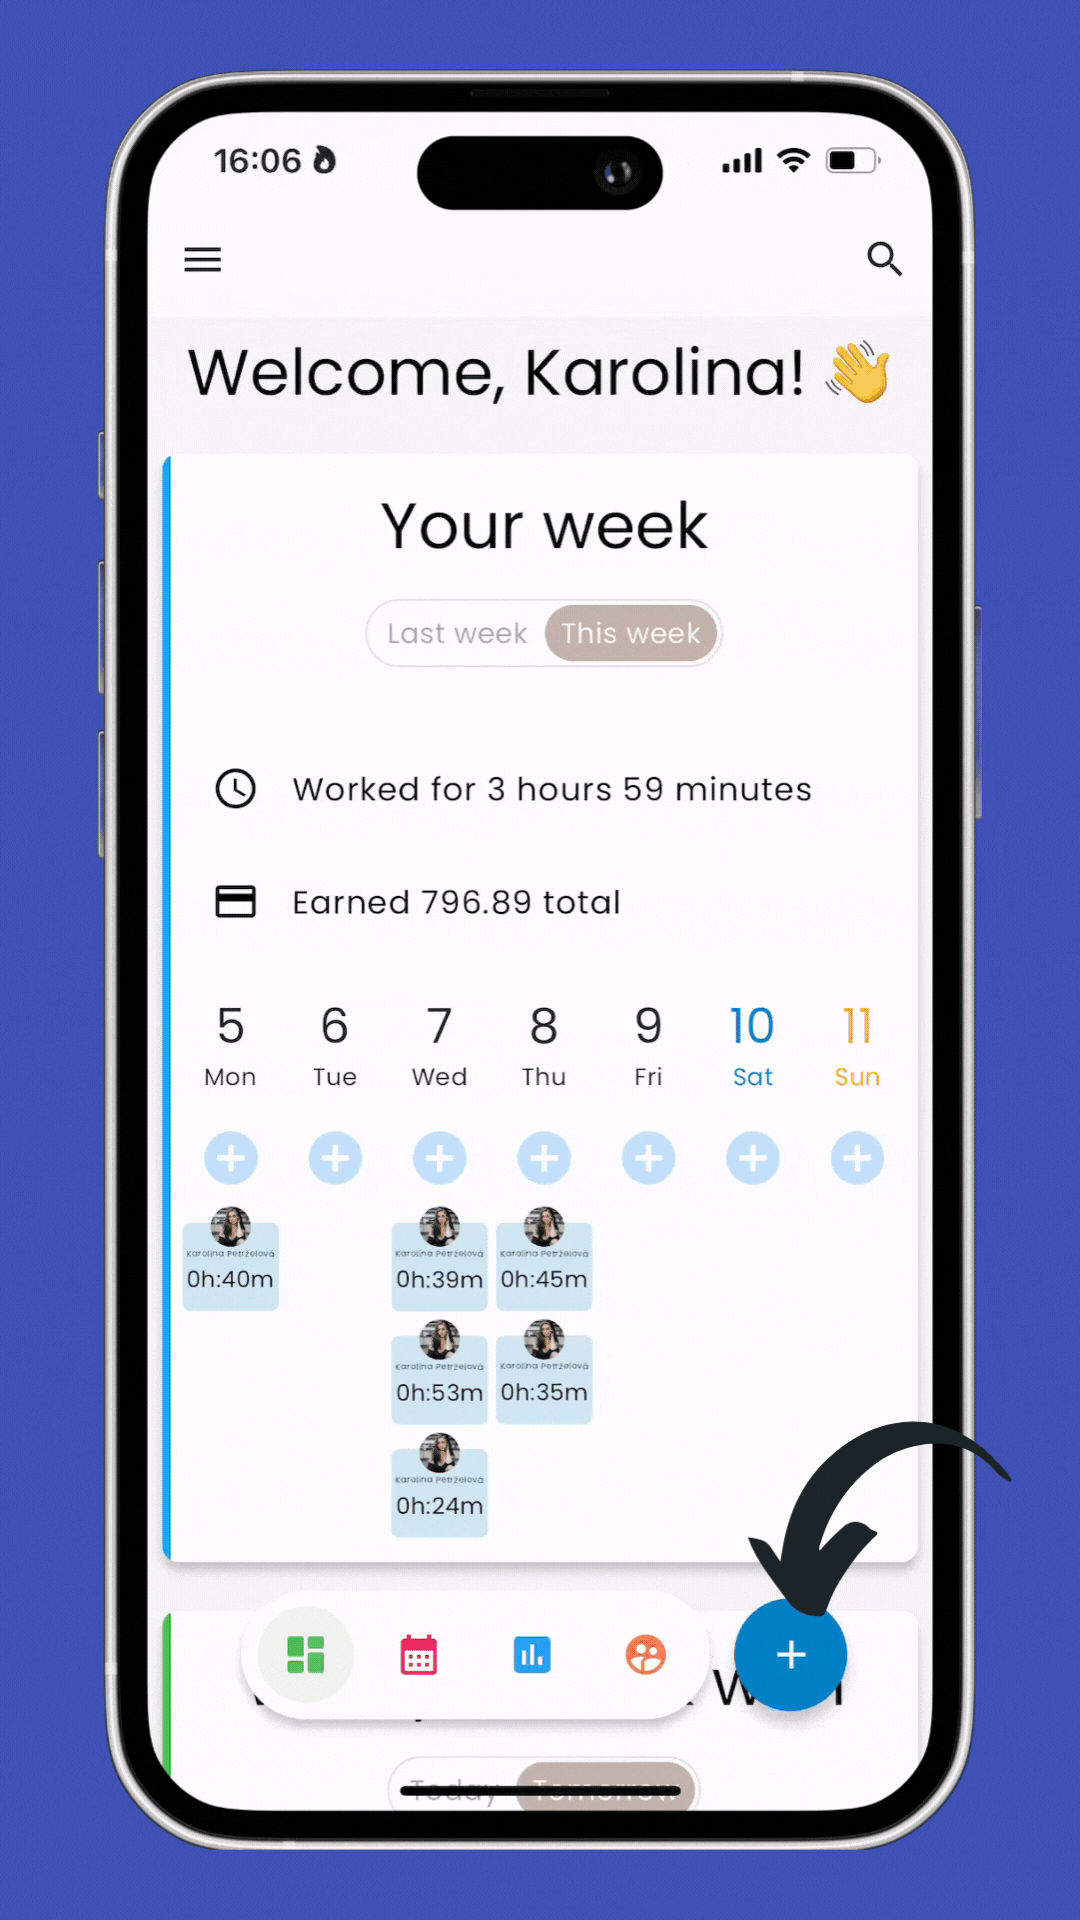
Start by launching the TimeChief app on your device.
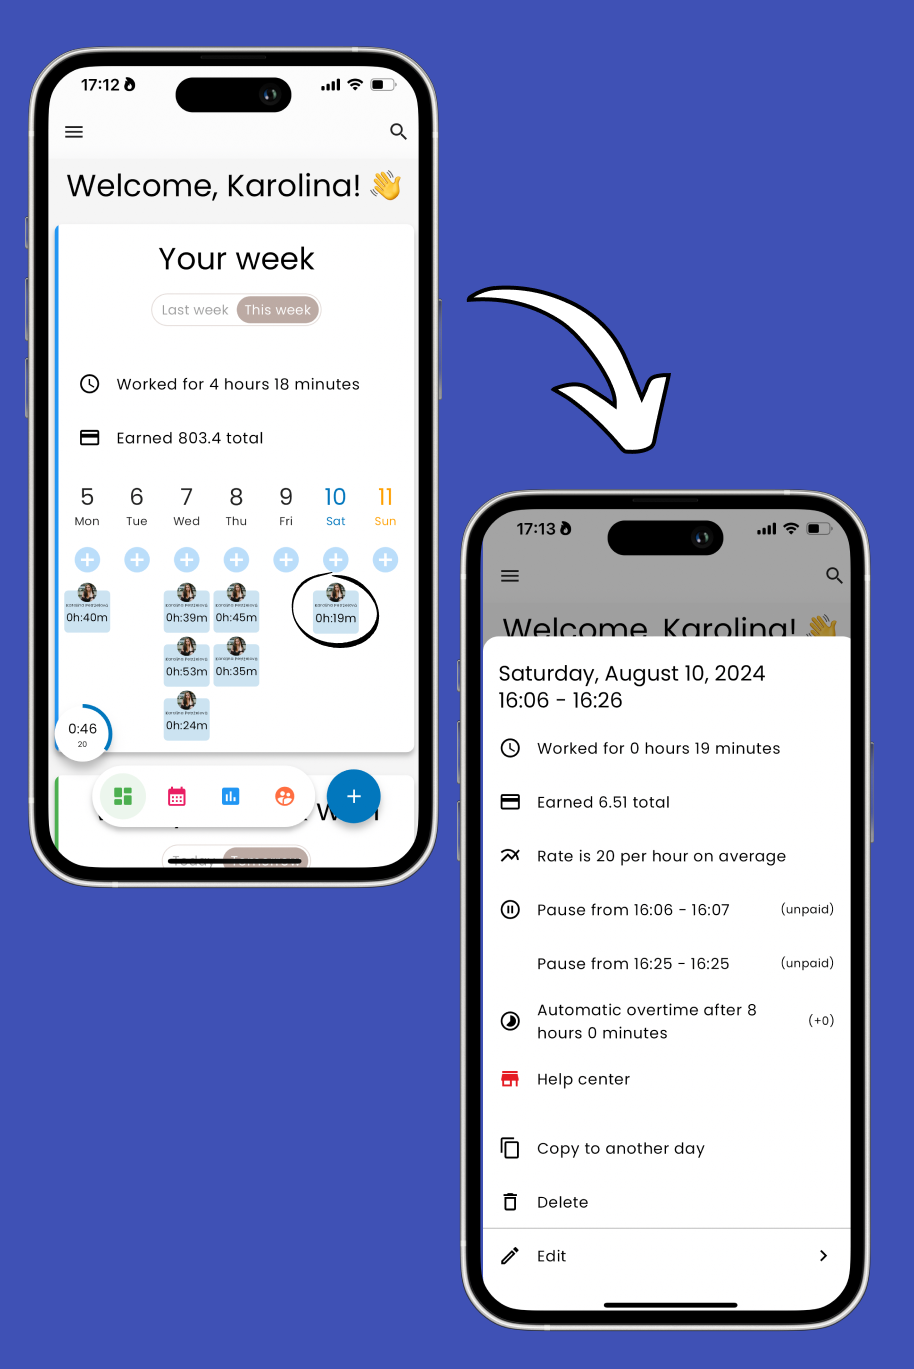
On the main screen, you’ll see an overview of your week. To create a new work record, tap the + button located in the bottom right corner of your screen.
From the options that appear, select Clock in.
The timer will appear, displaying your current working time in real-time.
If you need to adjust details such as your hourly rate or add a note, tap Edit. Make the necessary changes, then save your updated record.
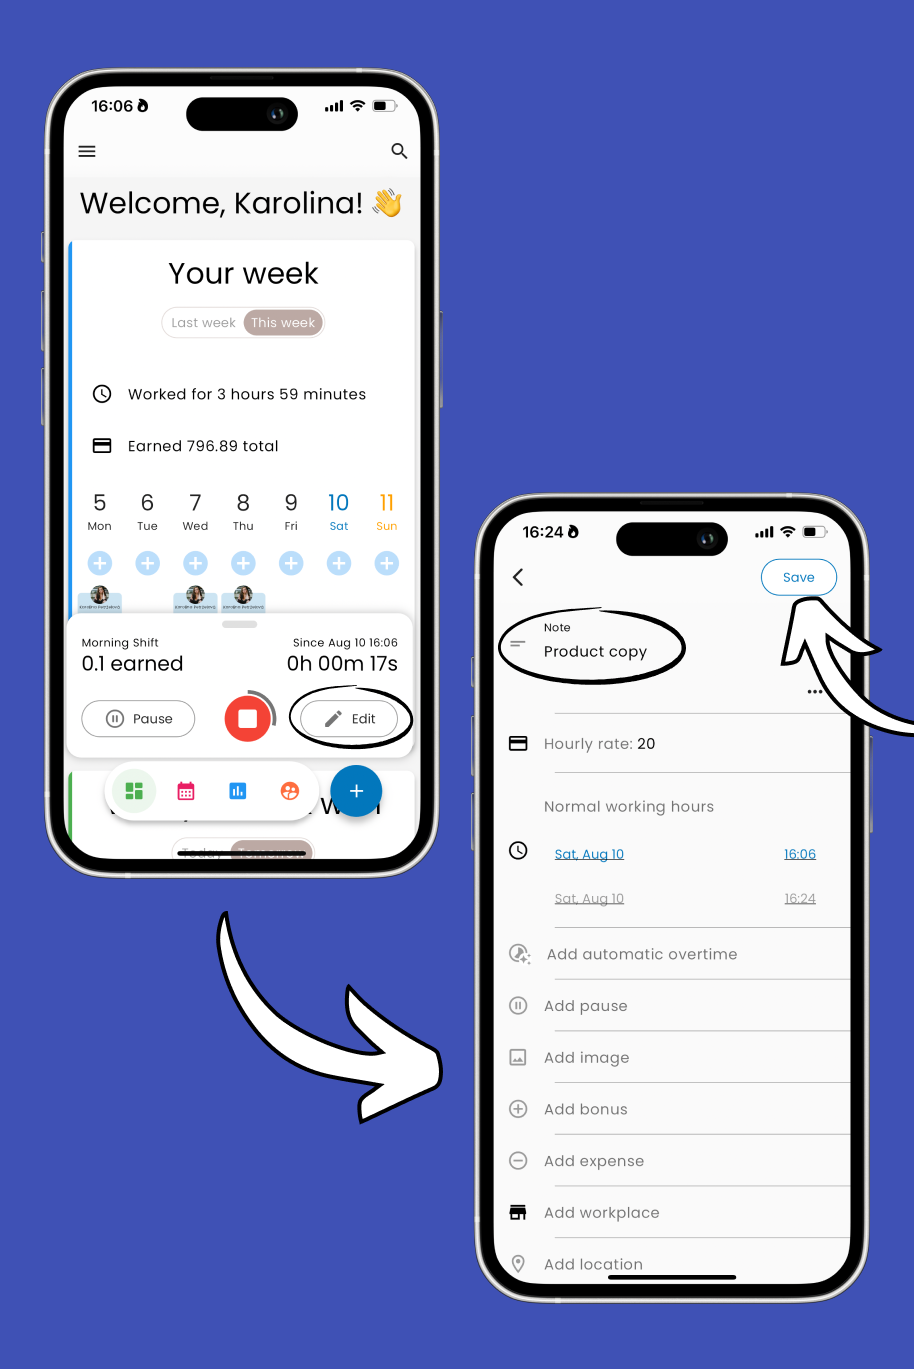
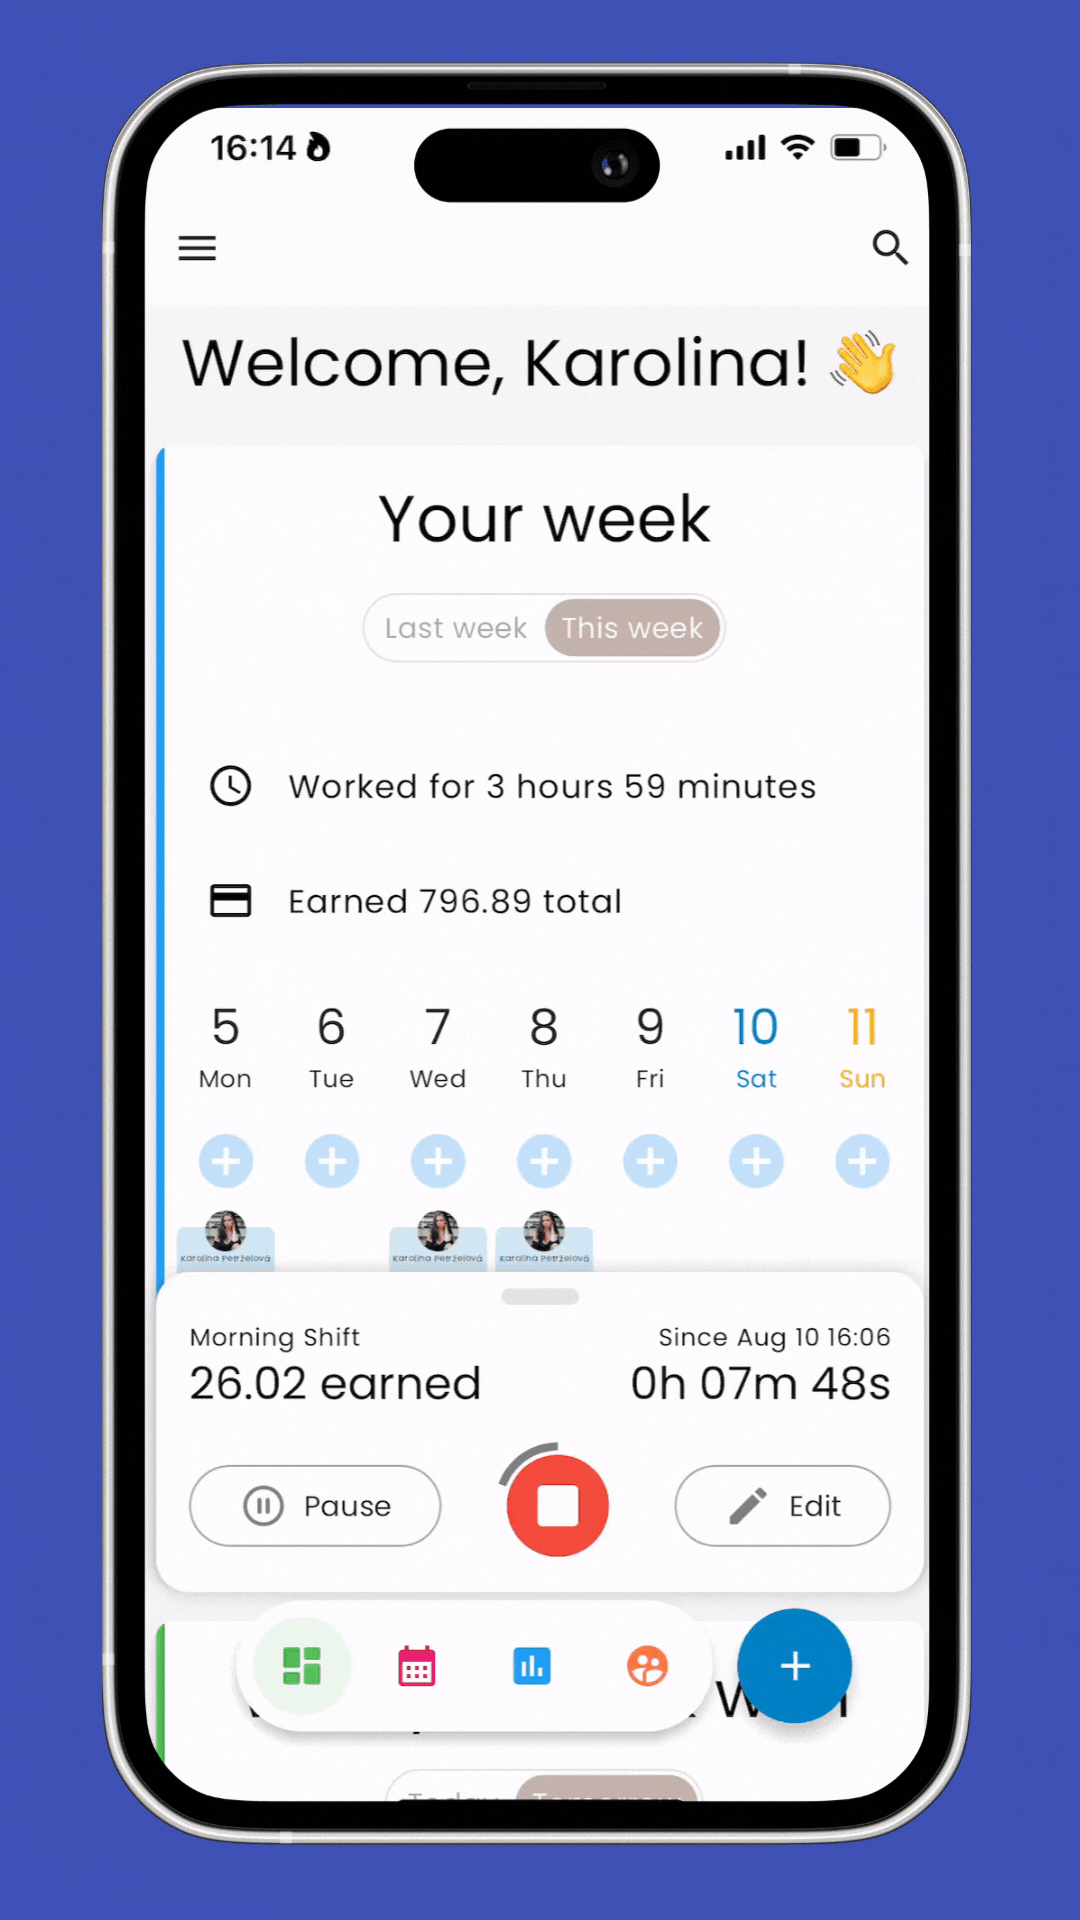
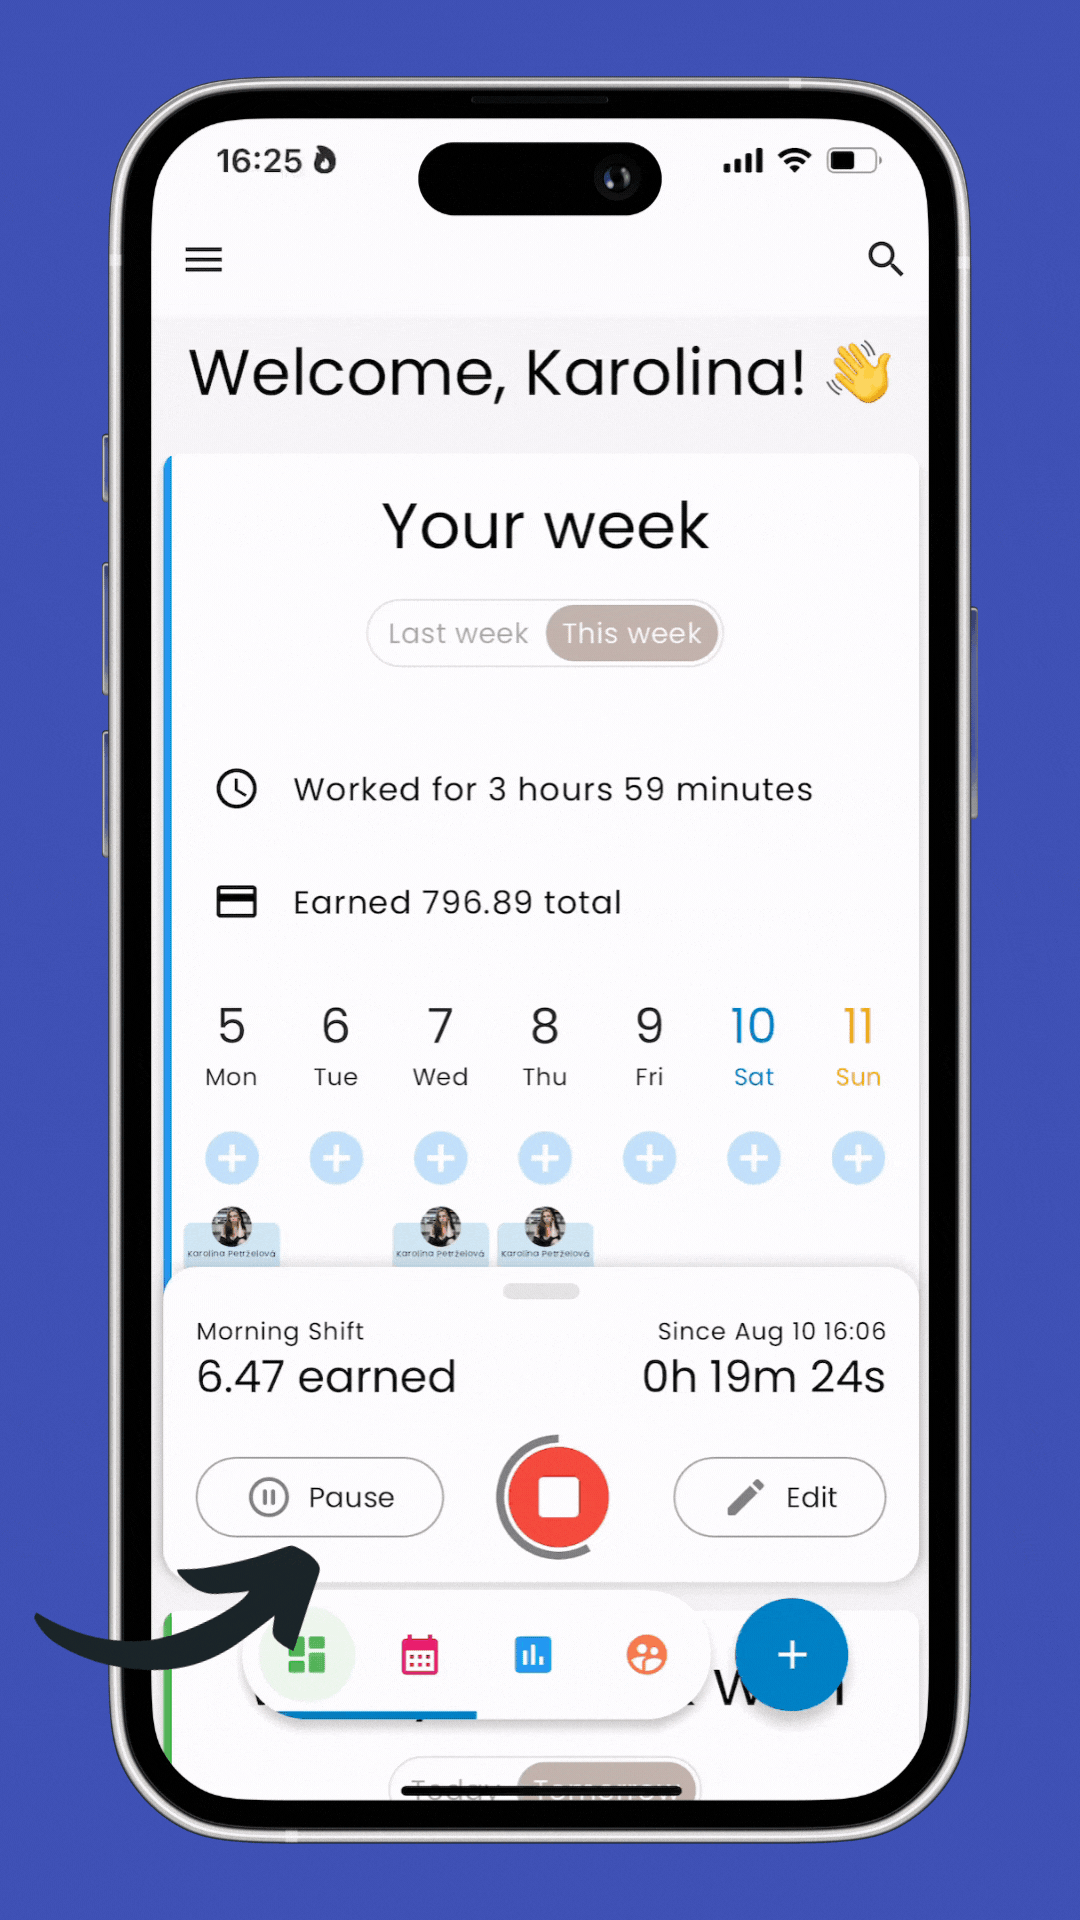
Swipe up on the timer to see all the details of your current work record.
To hide the details, simply swipe down.
If you want to temporarily hide the timer, swipe left or right.

If you need to take a break, tap Pause. This will pause the timer, and you can resume it when you’re ready to continue working.
When you’ve finished working, tap the Stop icon to end the recording.
After creating your work record, you'll see it on the main screen. Tap on it to see the details.
Using the clock-in feature simplifies the process of tracking your work hours, ensuring accuracy and ease in managing your time.
Related Articles: 👇🏼
Add Work Times Manually
How to add work times manually